Searchlight at the Hoodoos - Drumheller, AB
As many of you know, I’ve recently fell ass-over-armpit in love with night photography. OK, I realize that’s a weird way to say that, but my obsession with this cannot be understated. Not only am I walking away with photos I never thought I’d be able to take, but I’m totally digging the experience of shooting them too, so I thought I’d share a little bit of what I’ve learned so far.
I’ll admit, most nights I’m basically falling asleep on the couch by 9:30pm. I don’t go out much in the evenings these days, and mostly I’m focused on work, Dan, or my dog. But heading out on these night photography excursions means I’m just getting started around 9:30pm and sometimes not getting in till 3am. Why does this make me smile? Because it’s not “work”, it’s not partying, and it’s not adulting.
It’s pure joy.
Getting under a dark sky reveals an entirely new layer of stars that can’t be seen in the city. It’s incredibly humbling to star gaze and I haven’t experienced much else like it. Adding photography to the mix just makes it that much better.

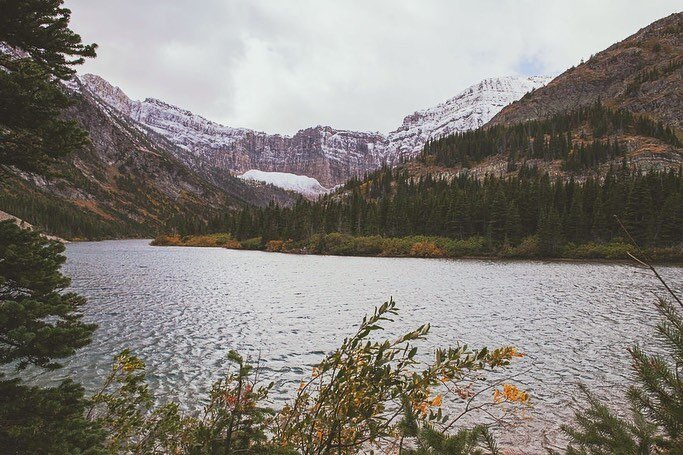
Forgetmenot Pond - Kananaskis, AB
It’s also a little scary.
There’s something alluring about heading out into the wild in the dark of night. It feel adventurous and exhilarating, but when you leave the glow of the city behind and enter an extremely dark natural environment, it gets the adrenaline going. (More on night photography safety down below!)
Now, I’m fully aware that none of the night photos I’ve taken so far would have been possible without my friend Adam Goodwin generously sharing all of his advice, tips and tricks with me. The guy is mondo talented and has spent years honing his skills. I’d encourage you to check out his work soon if you haven’t already!
Things I already knew:
A tripod is 100% necessary. Don’t have one? Forgot it? Can’t afford one? No problem. But you’ll need to find something to steady your camera on. A rock, bench, a dumpster, I don’t care. Your shutter needs to be open long enough for for it to see the light of the stars. That means it needs to remain perfectly still while it’s open. You can attempt hand held, but be prepared for blurry/moving stars.
Use a timer, cable release or intervalometer. In the interest of not moving the camera, you’ll need the camera to be steady as soon as the shutter opens. This means if you were to manually push the shutter button (even carefully), it’s highly likely you will shake the camera enough to make your stars motion blurred. If you don’t have a cable release, try setting your timer to a 2 second delay.
Manual Settings. You’ll have to balance your settings so that the shutter is open long enough to capture the light of the stars, but not so long that you start to get trails from the rotation of the earth. This can happen faster than you’d think. To assist with this, set your camera’s ISO to as high as you can without seeing too much noise. This will make the sensor expose faster so you can see more with a faster shutter speed. My camera’s starting to show it’s age, so for me that would be 2500 ISO. For newer cameras, this can be pushed to 6400 ISO or higher.

Important things I’ve learned:
Set your focus on the stars using this method. I’m usually working with people, at events, or capturing things in the moment, so I rely heavily on auto focus. But with night photography, you’re going to want to manually focus on the stars to the best of your ability. A great way to do this is to switch your camera to “Live View” mode, move your square “cursor” over one of the stars (the bigger and brighter the better) and zoom in digitally as much as you can. You should be able to see one of the stars quite big on your screen and this is when you manually focus until the star looks as pointy and sharp as possibly. After setting your focus, exit out of live view mode but DON’T change your focal length. Your camera is now focused on the stars, so they should be sharp no matter which way you point your camera at the sky as long as your focal length/focus stays the same.
Weather and the phase of the moon makes a huge difference. On my least successful attempt at night photography, I was thwarted by a few things. Firstly, although the weather report predicted relatively clear skies, a thin layer of clouds moved into quickly and made my focusing way more difficult. Clouds can make for interesting additions to night photography, but when there’s complete coverage or a thin diffused cloud cover, it can be hard to work around. Secondly, on the same night it was a relatively full moon. This can be OK for lighting foregrounds, etc. but it’s usually a bit too bright to balance out the moon & stars. I would suggest starting night photography during a New Moon. You can also use a website like Clear Dark Sky to see how clear your area will be.

Moonlit Mountain - Vermilion Lakes, Banff National Park, AB
Shooting star trails. One cool thing I’ve recently learned is when shooting star trails, include the north star into your viewfinder before shooting your long exposure to create this swirling effect:

Star Trails - Drumheller, AB
Check out Star Stax for Photo Editing. Star Stax is a FREE program you can download and use to stack images and create star trails out of multiple exposures. It’s incredibly easy to use and can save you a huge amount of time.
Most importantly, stay safe. I didn’t realize how vulnerable I would feel shooting in the darkness until I was there. I live in Alberta, which means entering a natural dark sky territory also means the possibility of predators. To stay safe, I never go alone, we take flashlights, we always take a speaker to play loud music behind us, we never have food with us, and we also carry bear spray. I like to park my car as close to where I’m shooting as possible, or even park so my car is directly behind me. Once in awhile we will scan around us with a flash light to check for reflection of eyes, or I’ll yell or set off my “Panic” button on my car alarm to scare off anything close by. We’ve heard coyotes howling quite close by before and it can be chilling. So be sure to use the buddy system, be loud, and carry bear spray and flashlights. Use a GPS or compass if you’re wandering into an unknown area. Staying aware of your surroundings, the terrain and weather is majorly important. Dress appropriately, bring warm drinks, and be prepared. Having a buddy to car pool with also means there’s far less chance of falling asleep during night driving. It’s far more fun with a friend anyways!
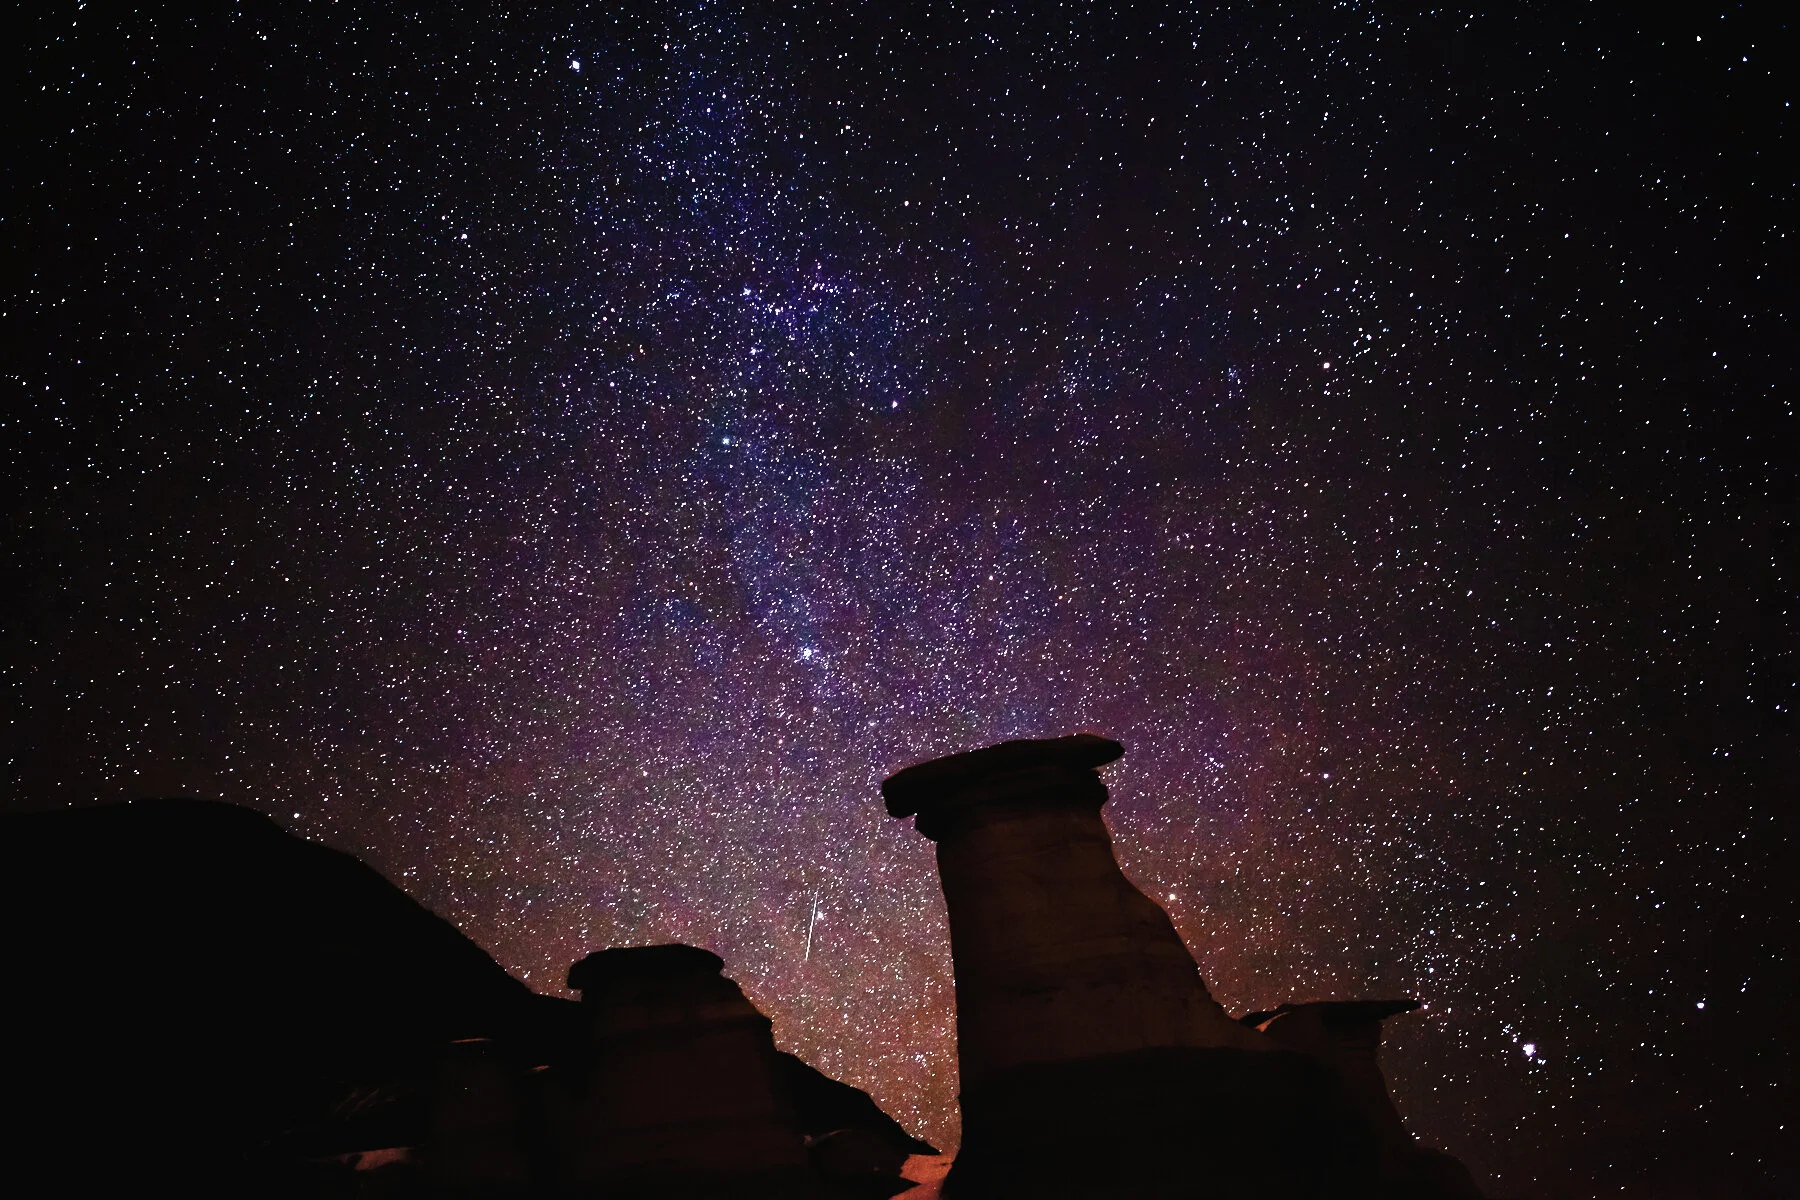
Meteor Over Hoodoos - Drumheller, AB